Follow these simple steps to seamlessly point your domain from GoDaddy to GreenGeeks and streamline your website management process.
1 – Login to your GoDaddy account and look for your domain
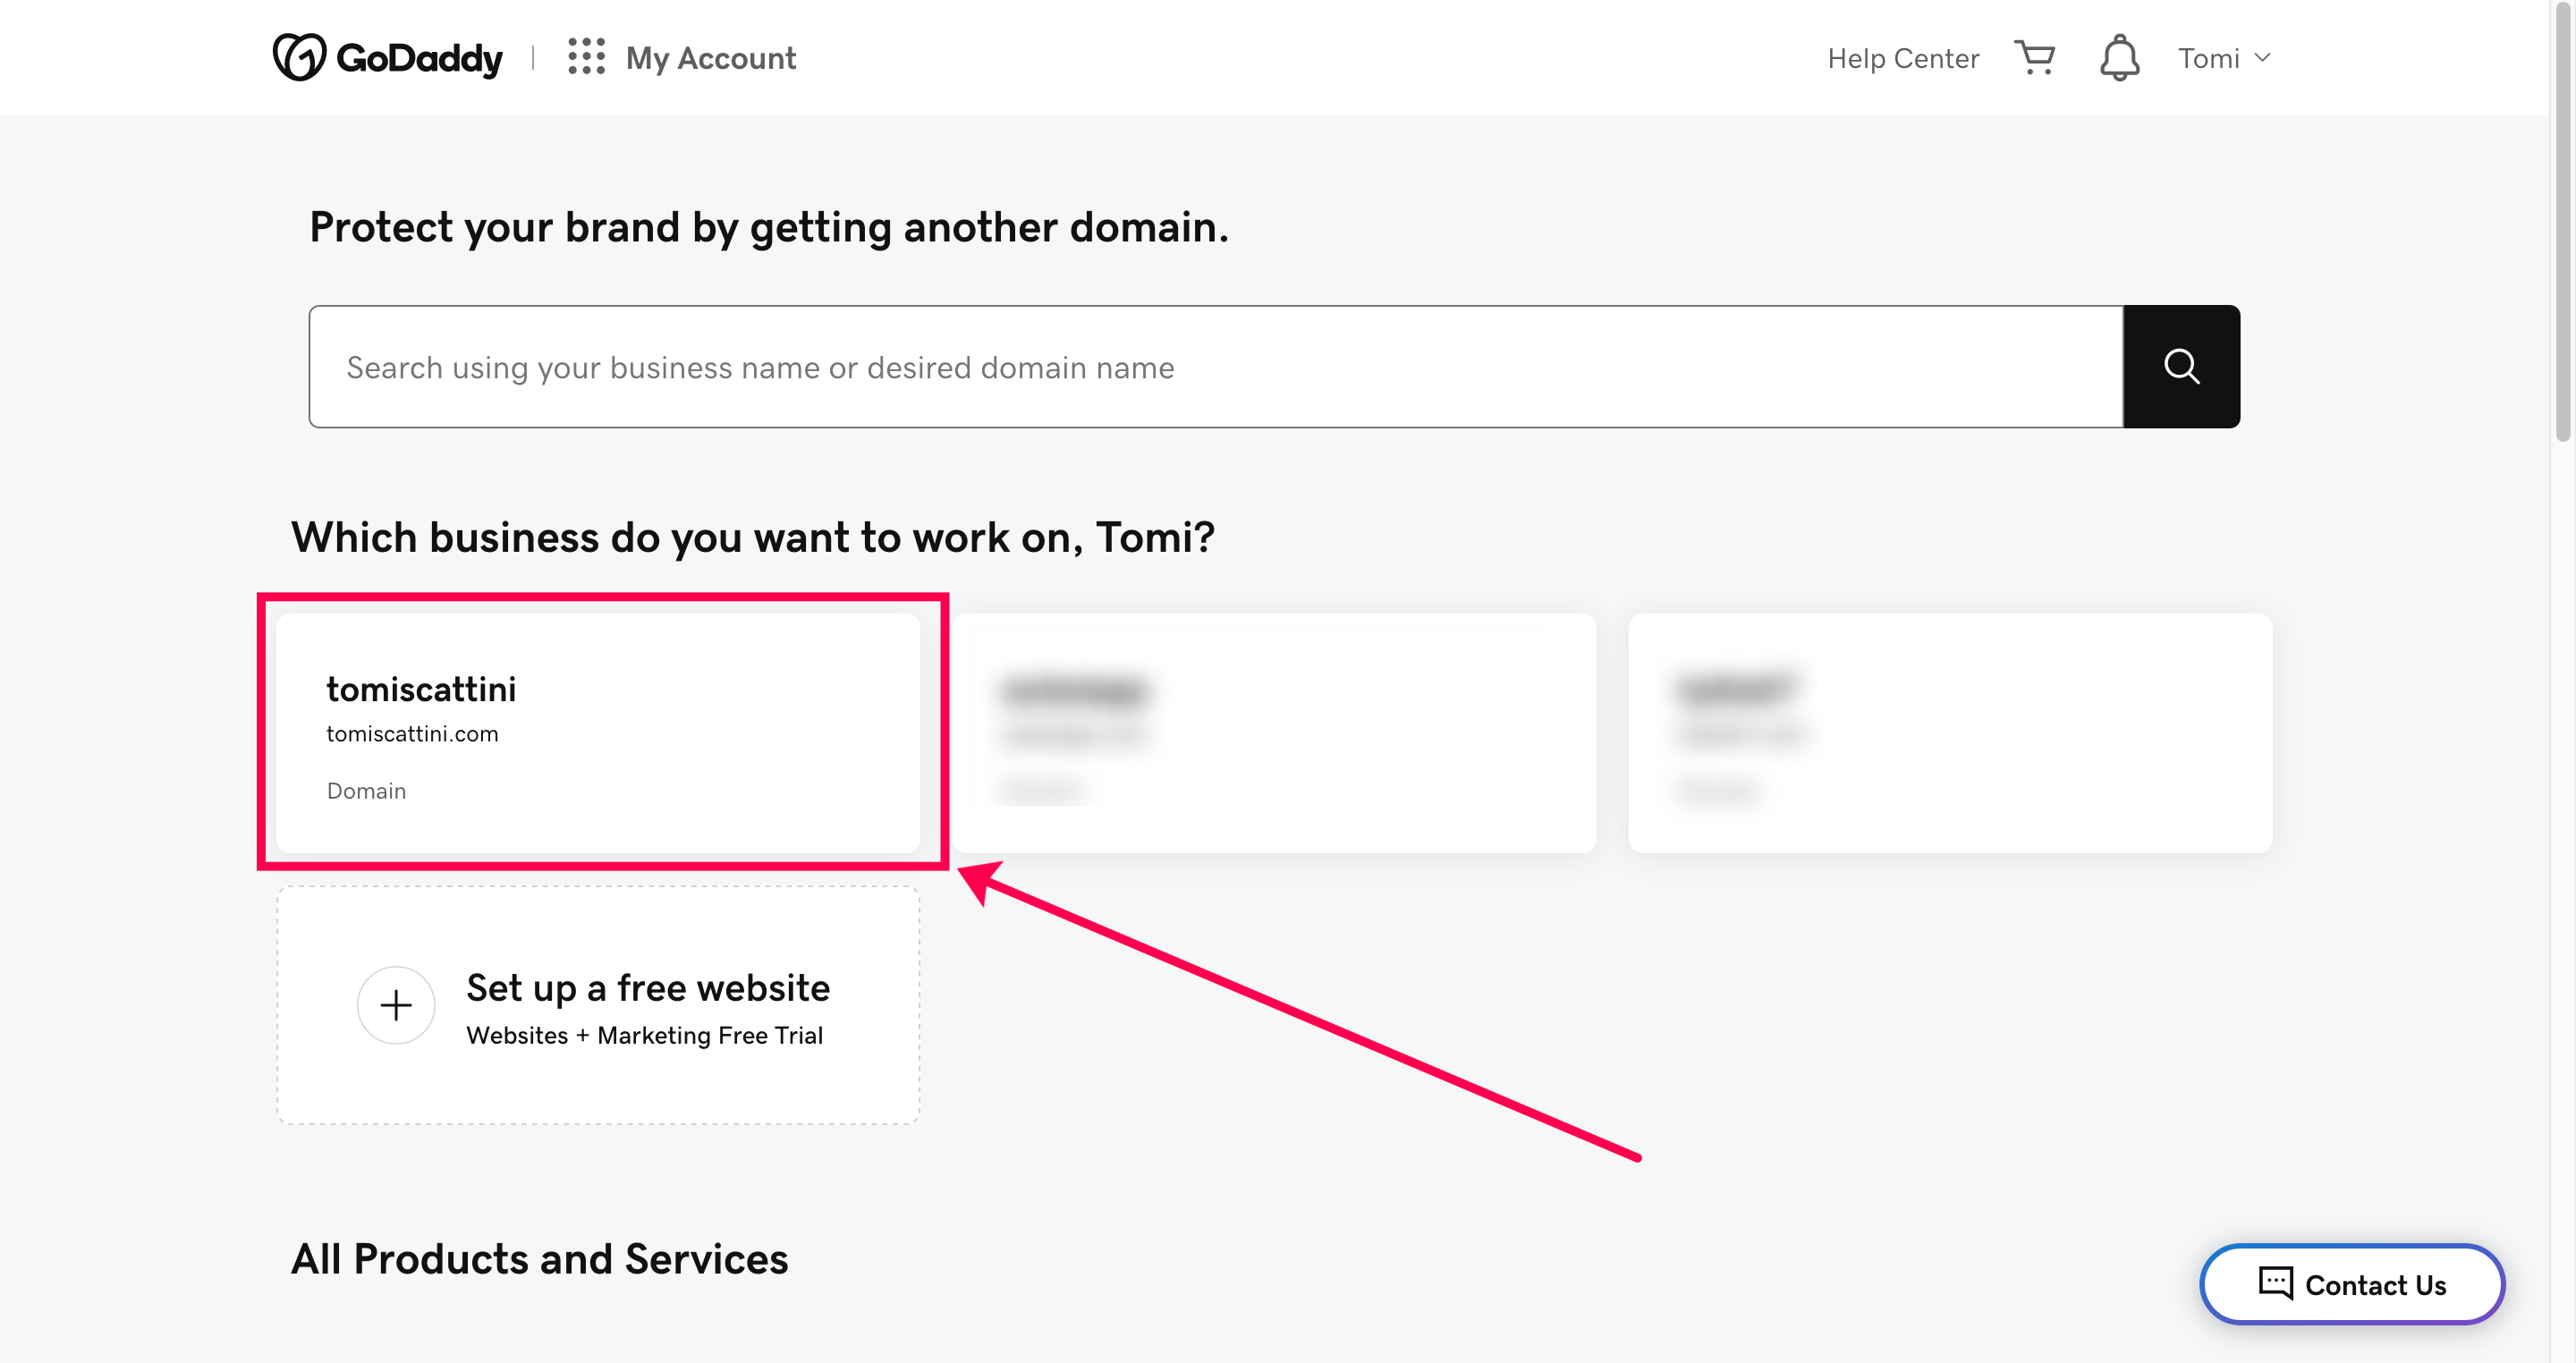
Once you logged in to your GoDaddy account you will see a screen with all your purchased domain names.
Click on the domain name you want to point to your server.
2 – Look for the “manage DNS” settings
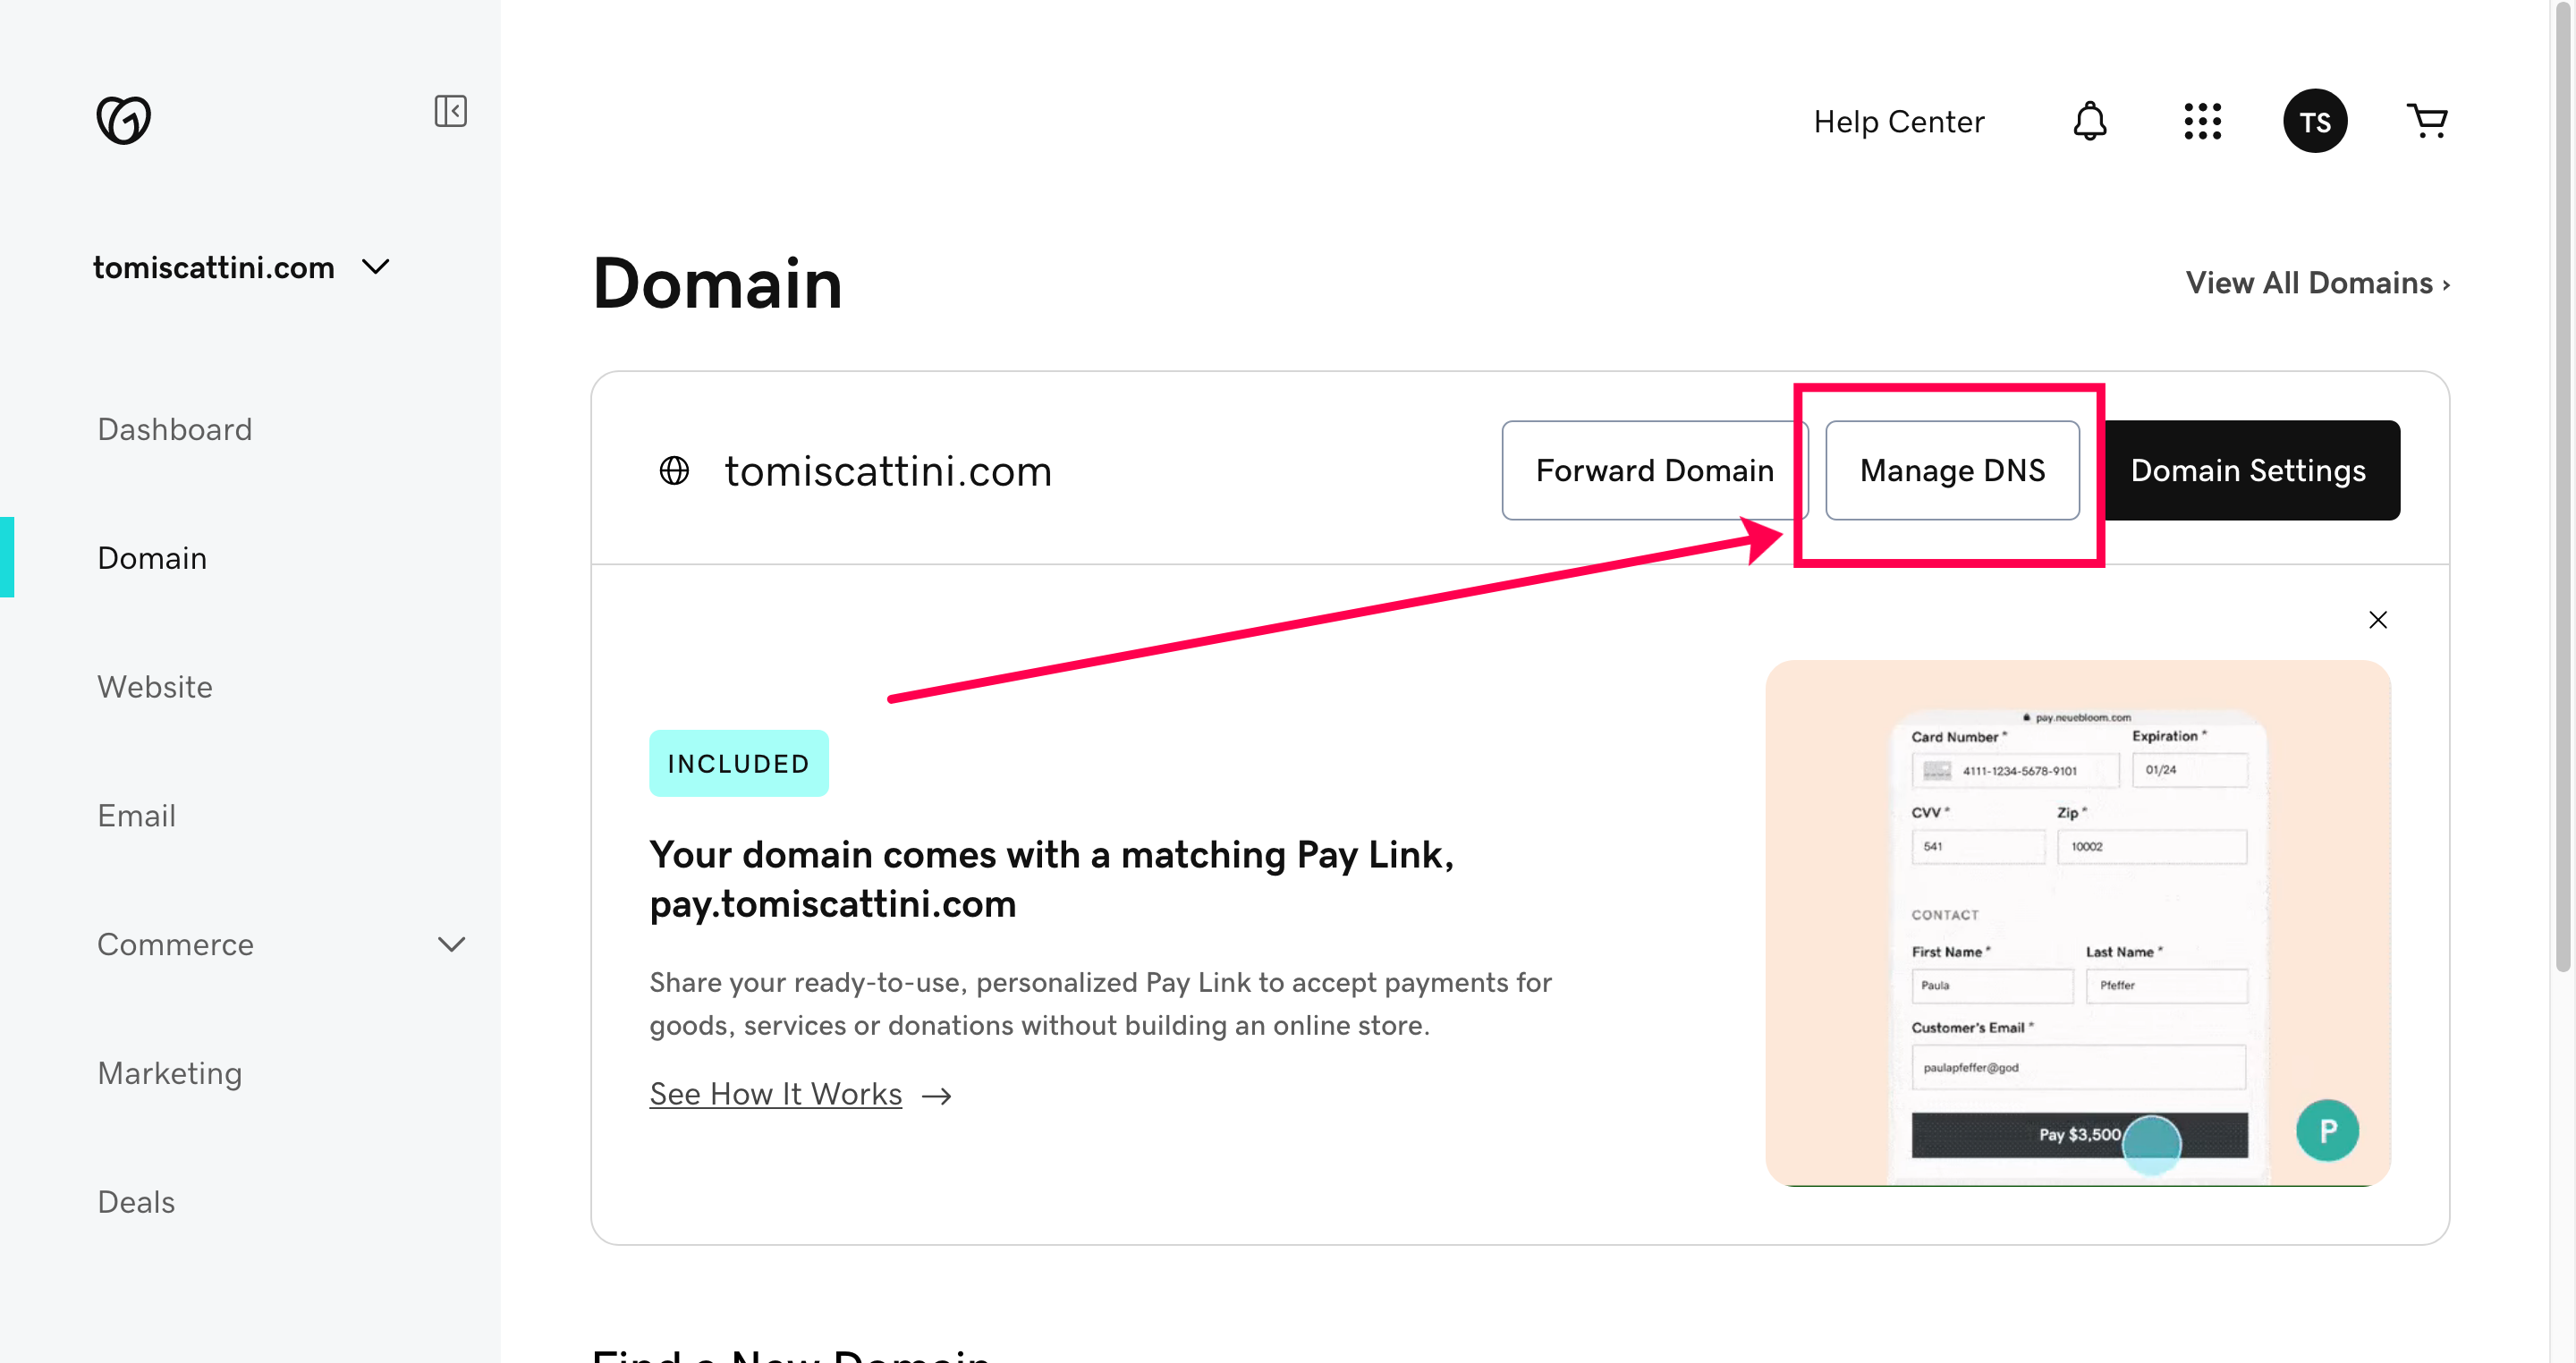
Inside your domain settings page you will have to look for the “manage DNS” option. In GoDaddy you can click on “Domain” on the left hand side menu.

Then click on “Manage DNS”
3 – Edit Nameservers
Now you are in the DNS settings section of your domain, here is where you can manage all the different types of DNS configuration. We are only looking to change the “Nameservers” to point our domain name to GreenGeeks and let them manage all the DNS for this domain.
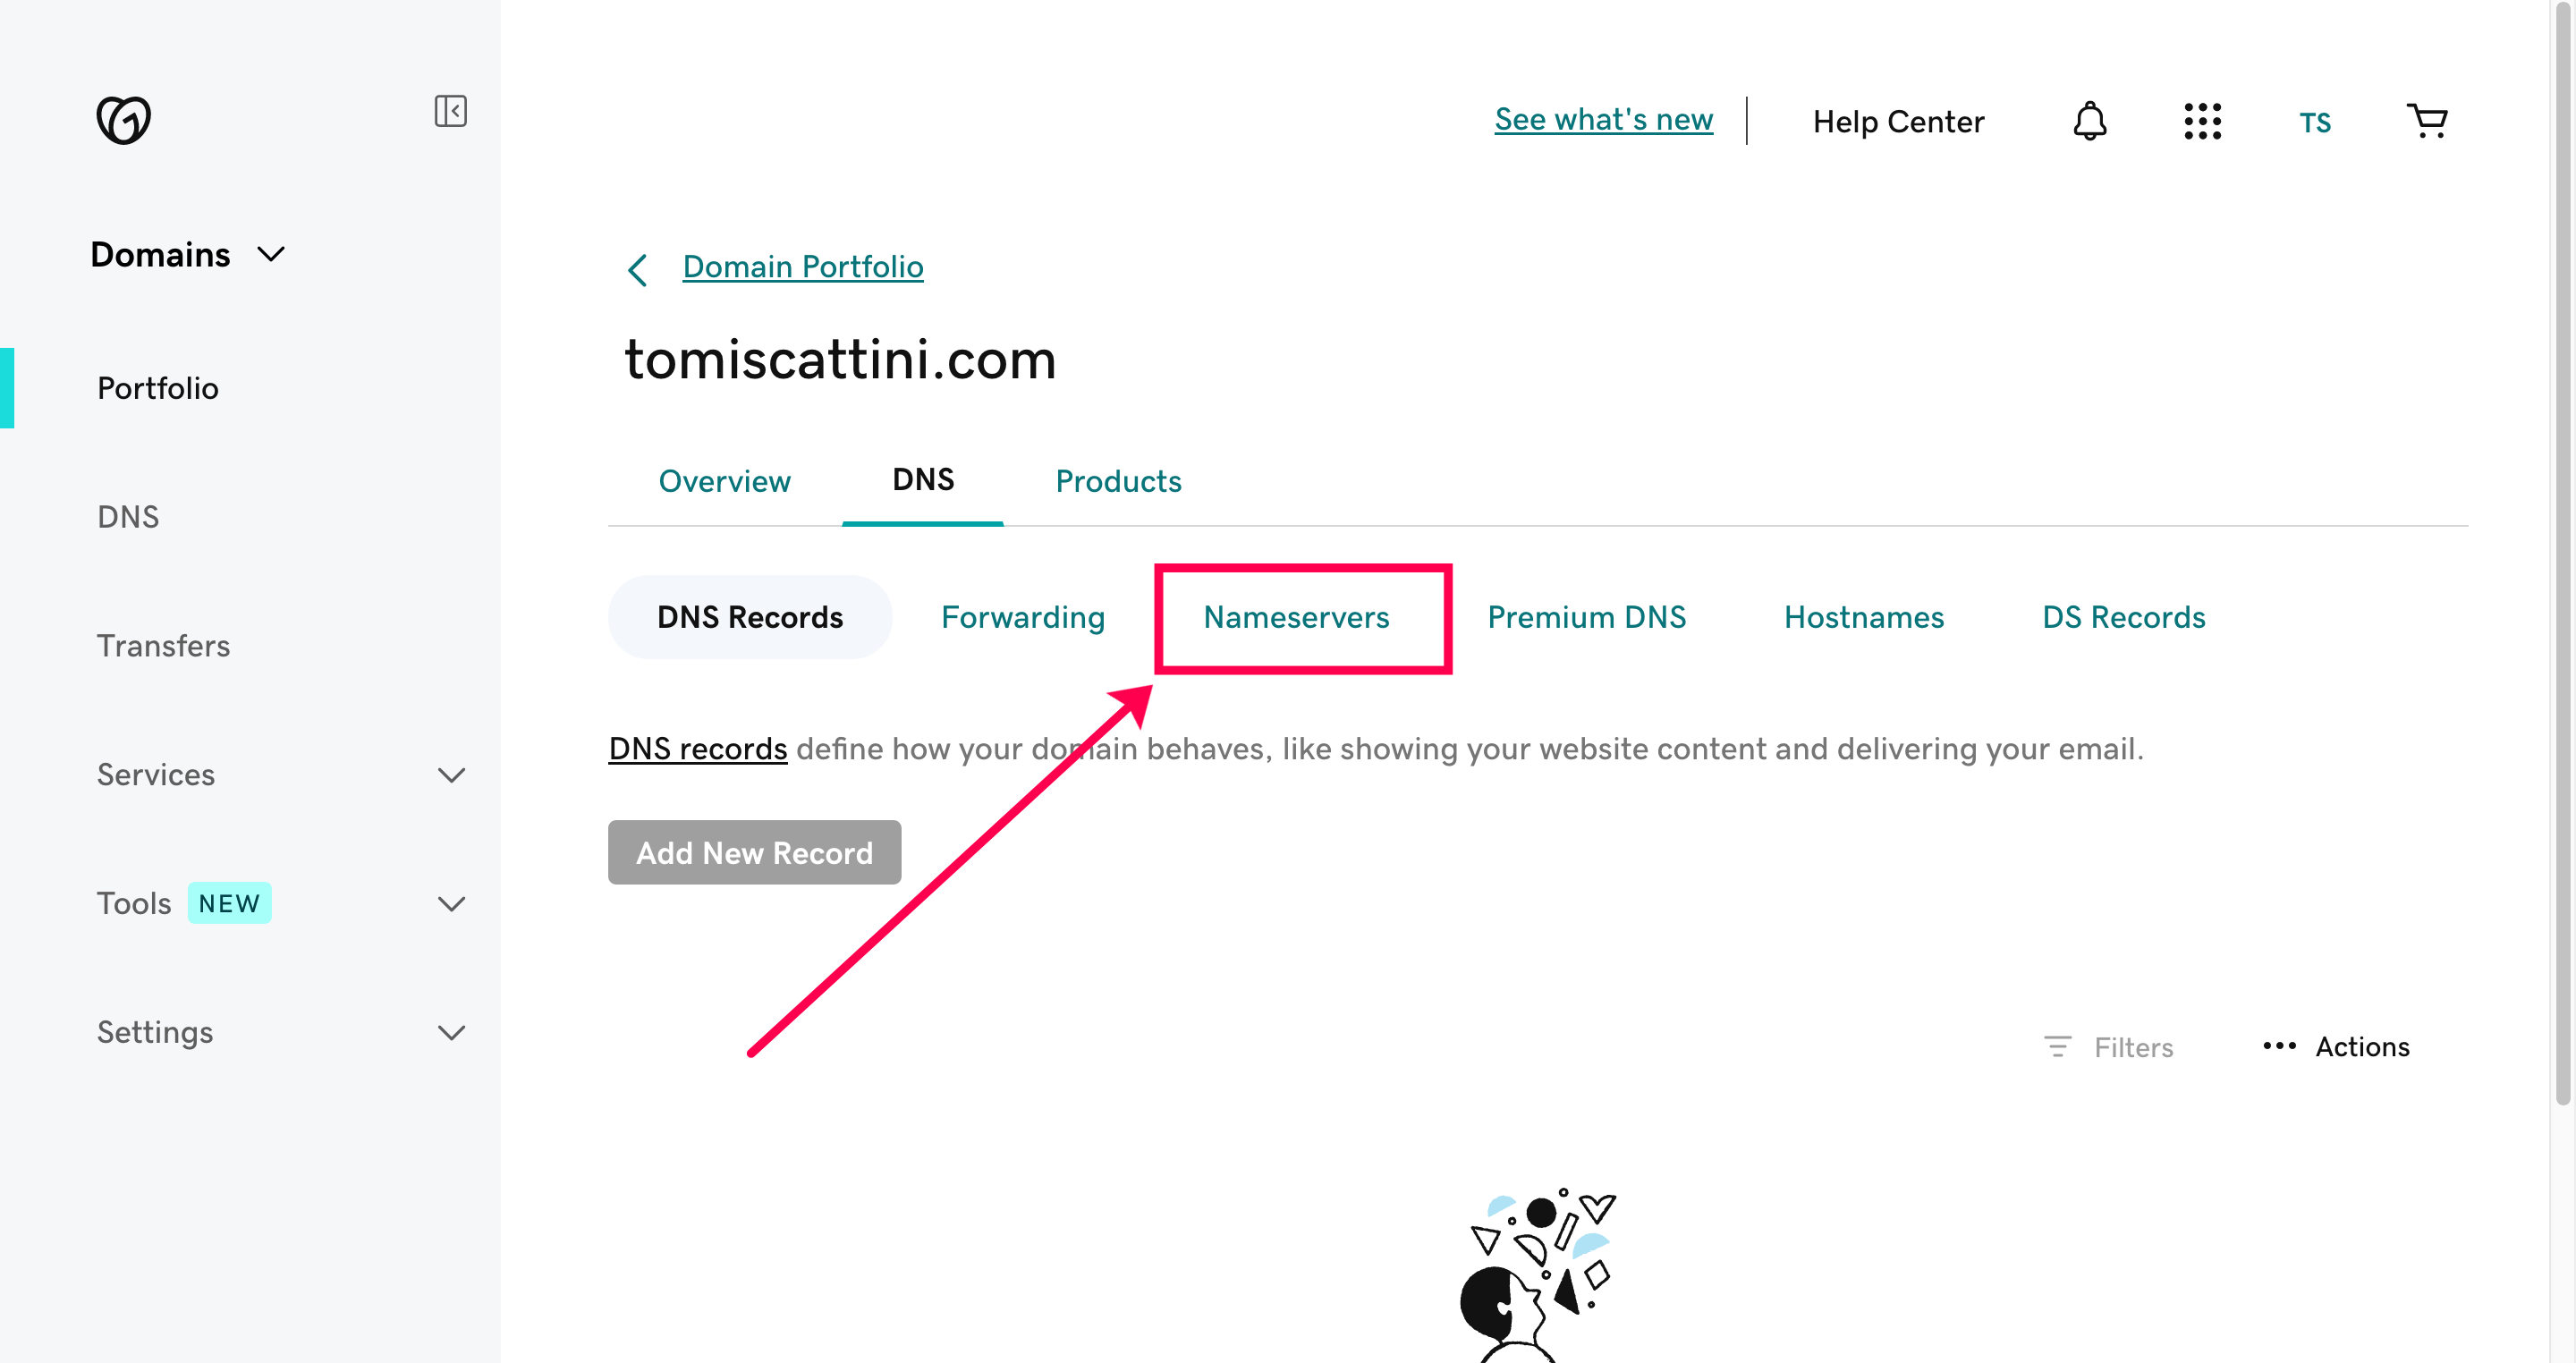
First click on the tab “Nameservers”.
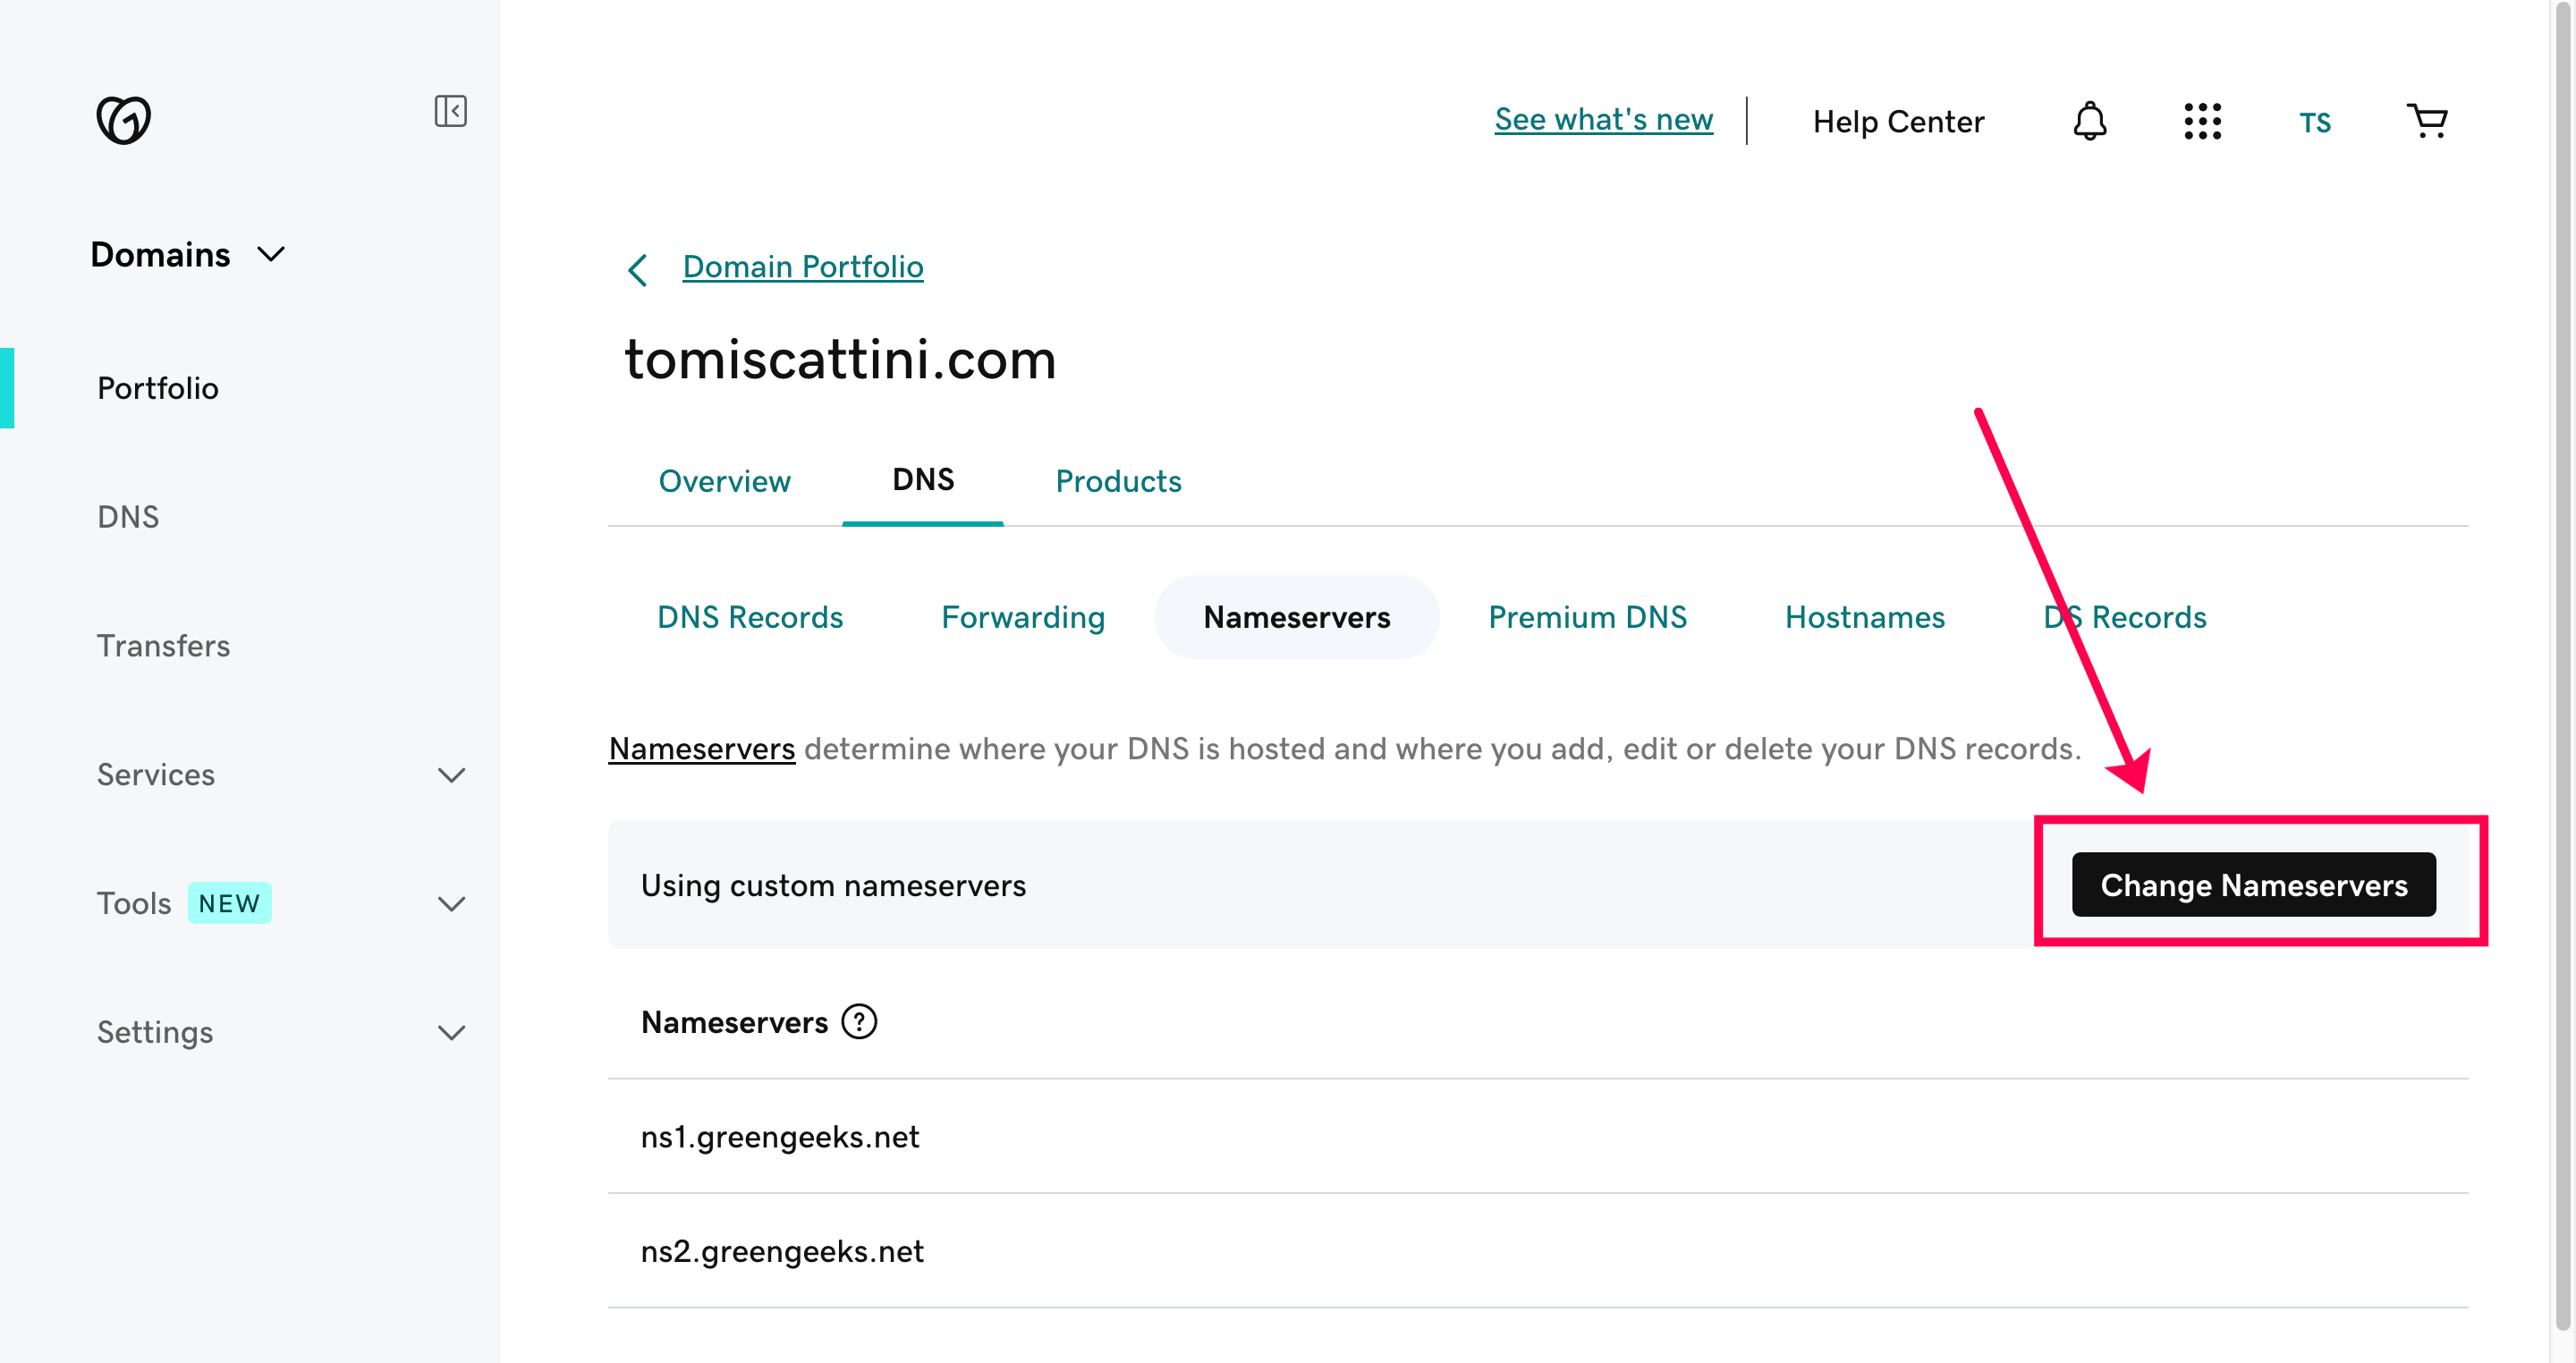
And then on the button to Change Nameservers
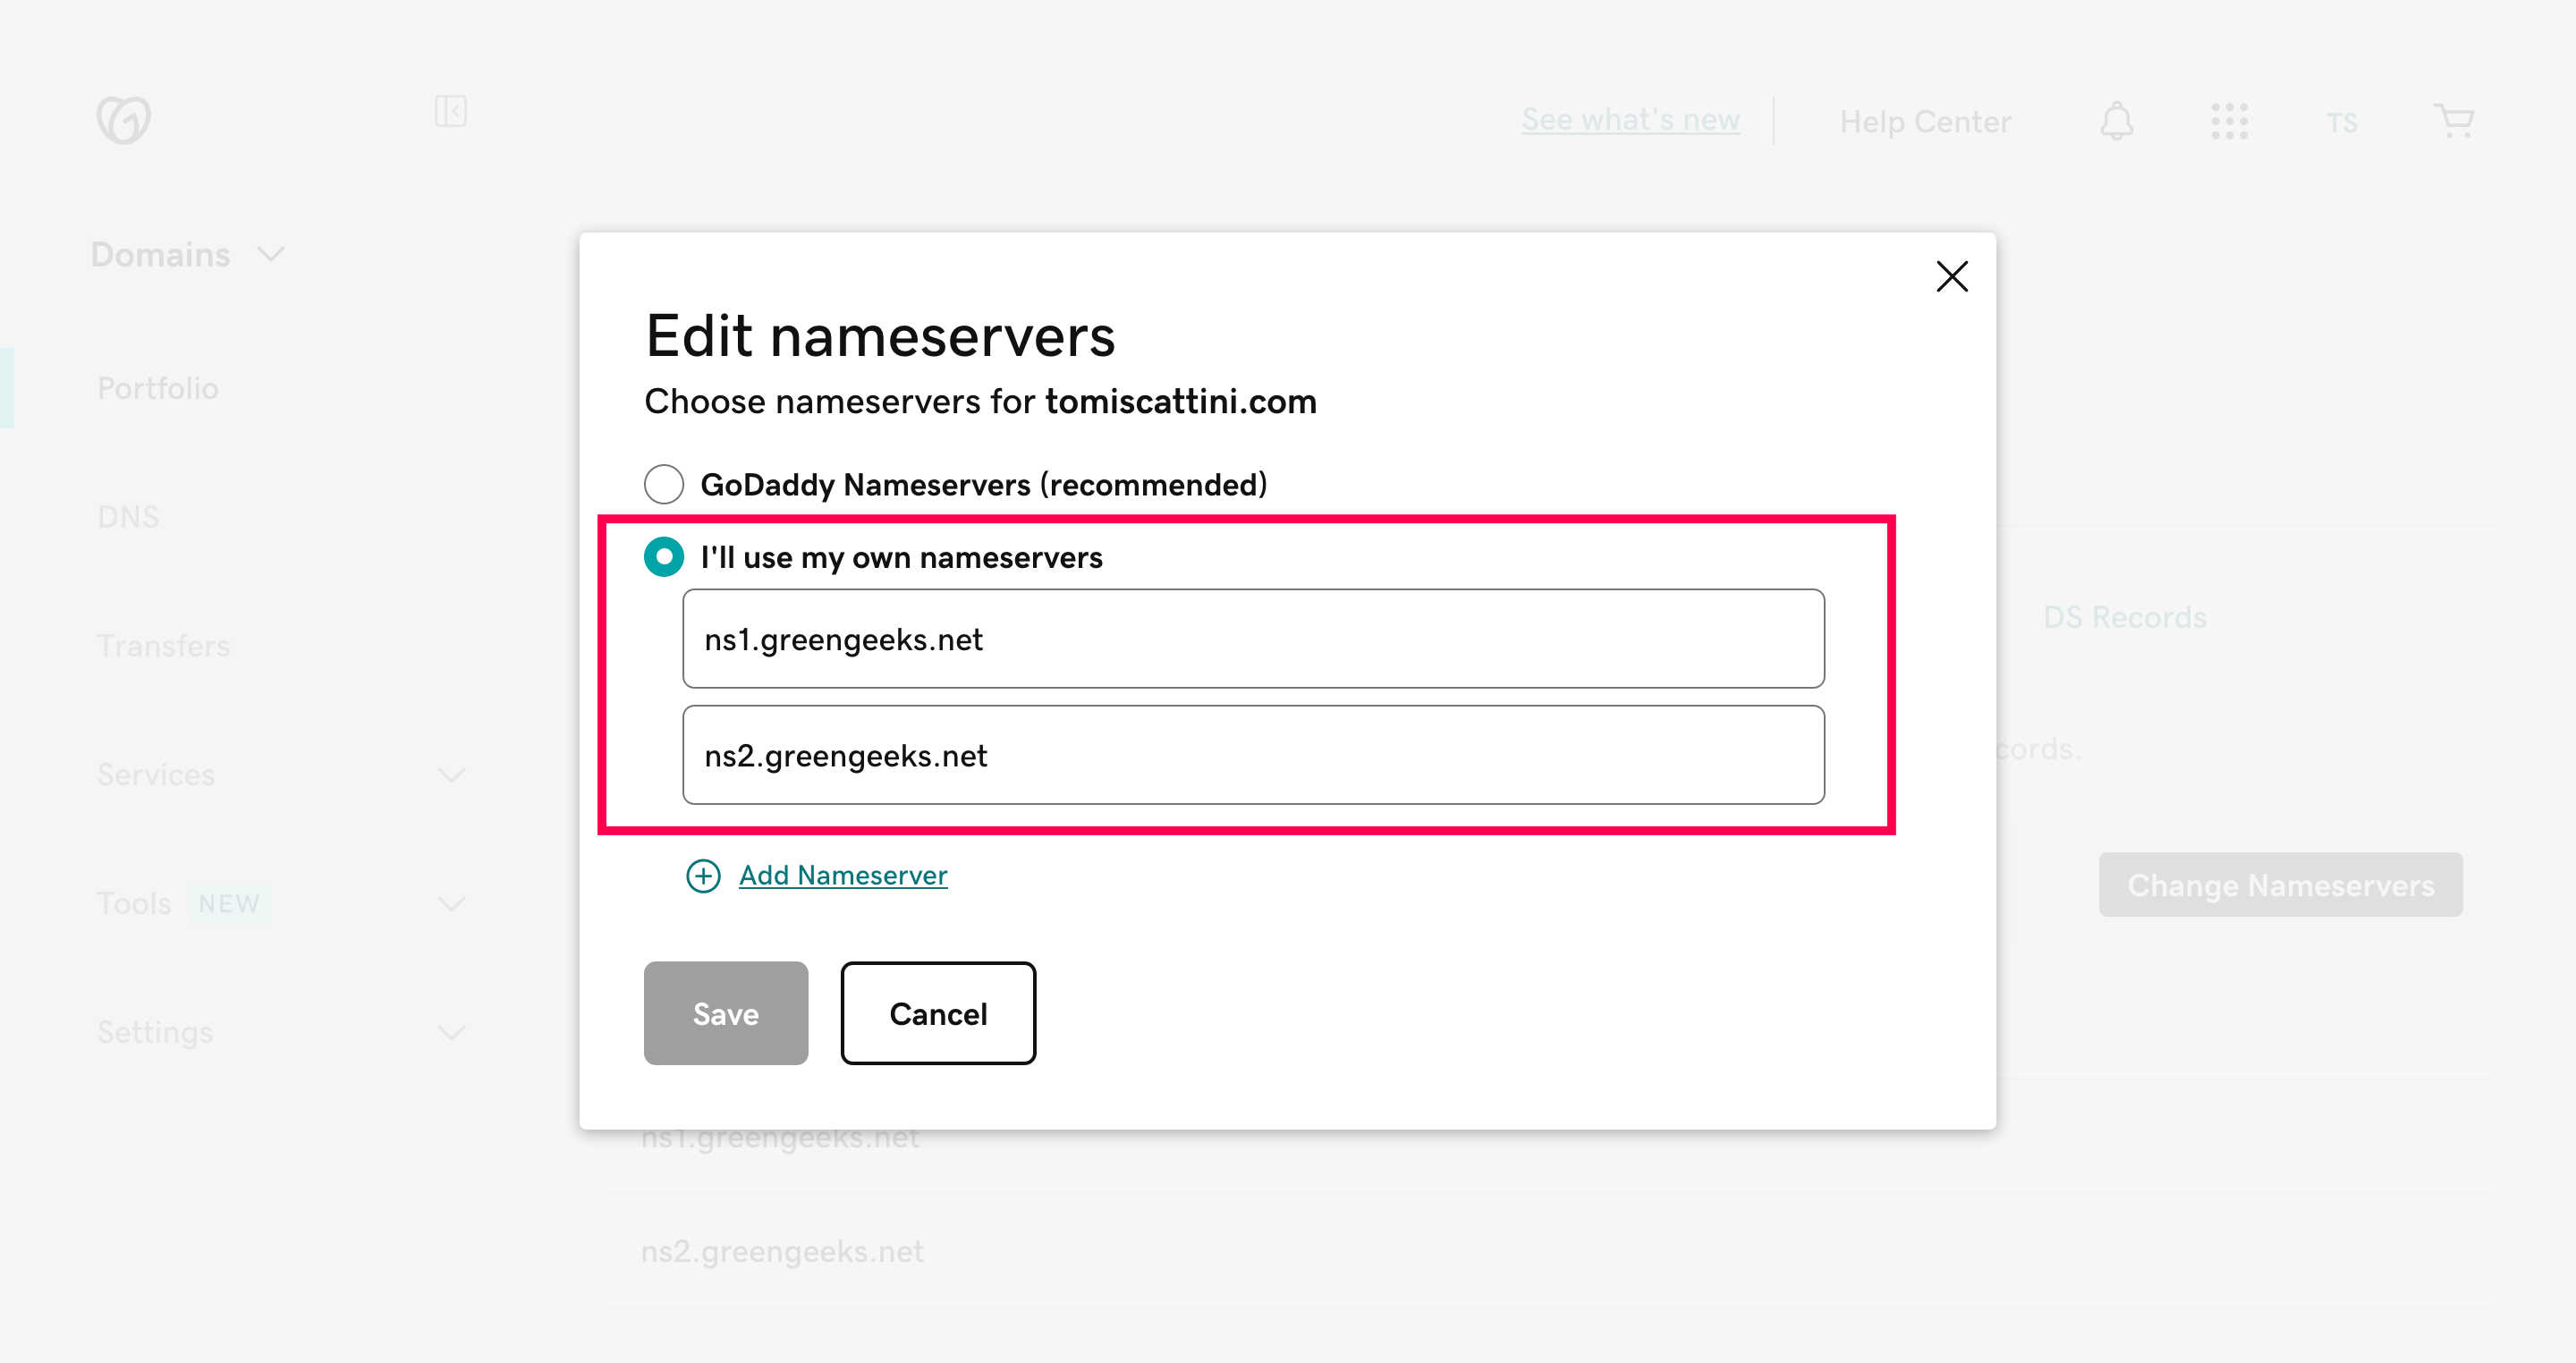
A popup will appear where you can put the new Nameservers. In our case, since we want to point this domain to GreenGeeks we will use the following Nameservers provided by them:
- ns1.greengeeks.net
- Ns2.greengeeks.net
Check the option “I’ll use my own nameservers” and insert the two urls on the text fields like this.
And that’s basically it on GoDaddy, if you purchased the package to host your landing page with Itakhi just let us know by sending a message to [email protected] and we will take over the rest of the process. Otherwise if you are hosting your landing page yourself you can log out and go to your GreenGeeks account. Continue reading this post for the next steps.
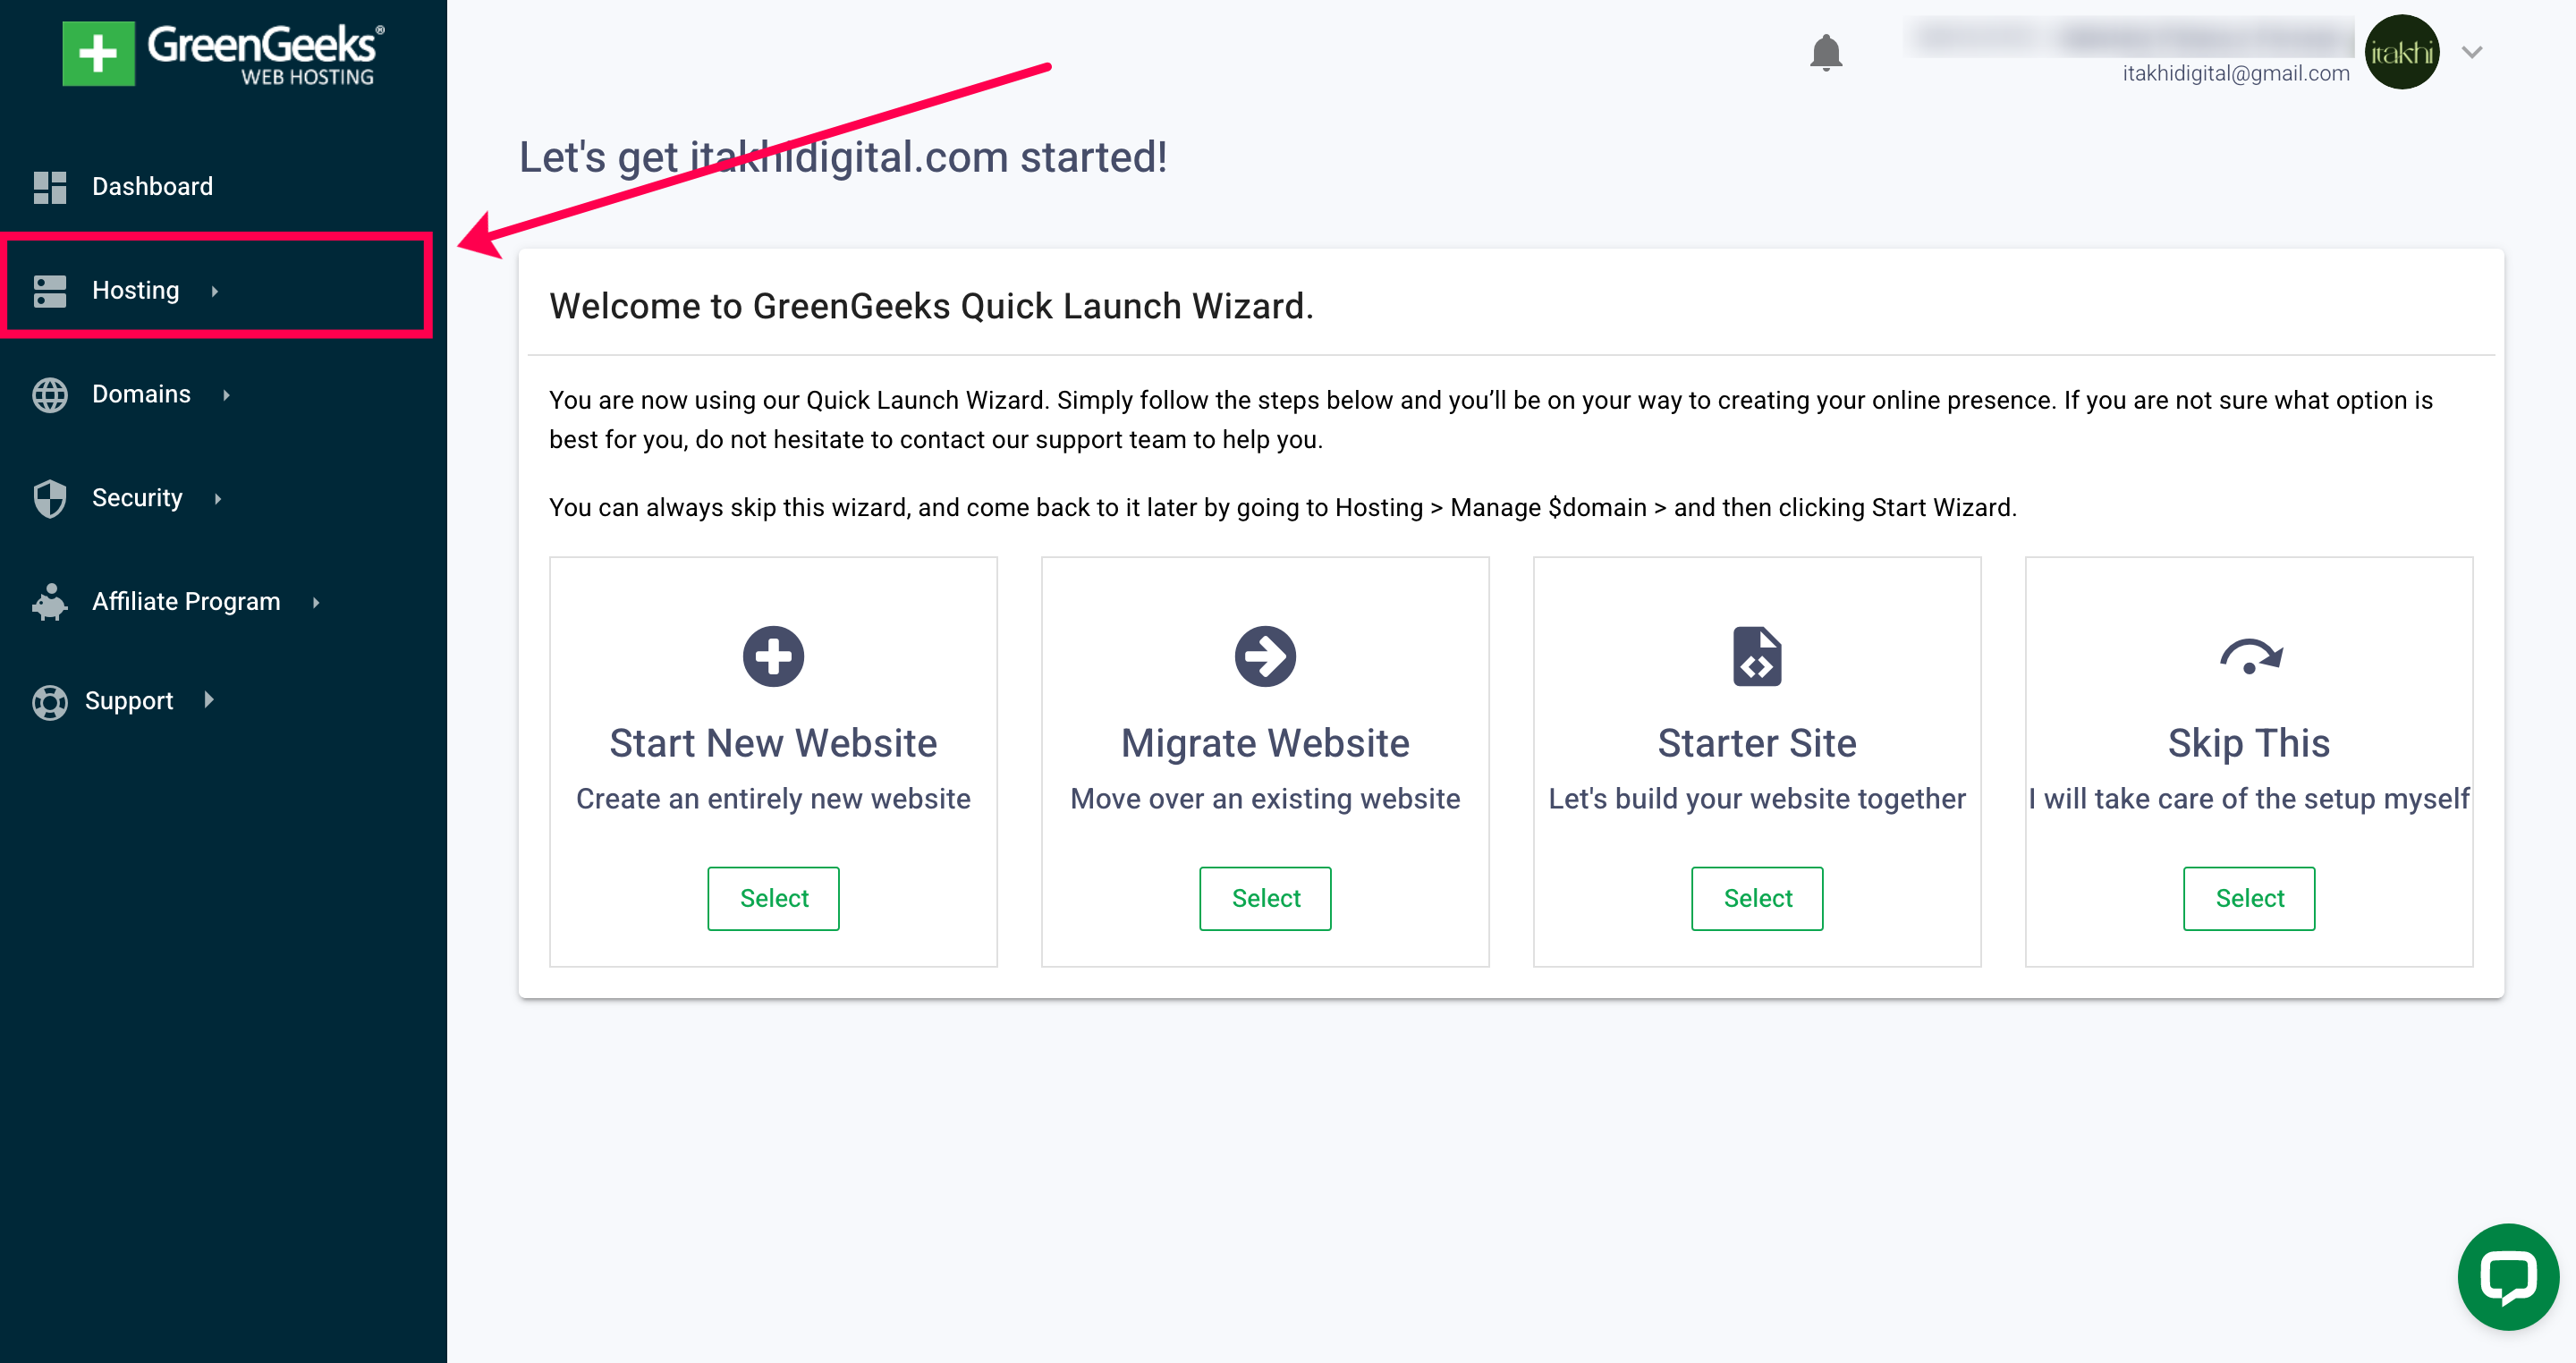
4 – Login to GreenGeeks and add a new domain
When you login to your GreenGeeks account you will see the summary page. On the left hand side menu you will find “hosting” which is the section to manage your hosting settings. In this menu “Domain” refers to the domain names you buy inside GreenGeeks (which you can totally do as well) but since we are learning how to point a domain from an external provider to our server we need to click on “Hosting”.
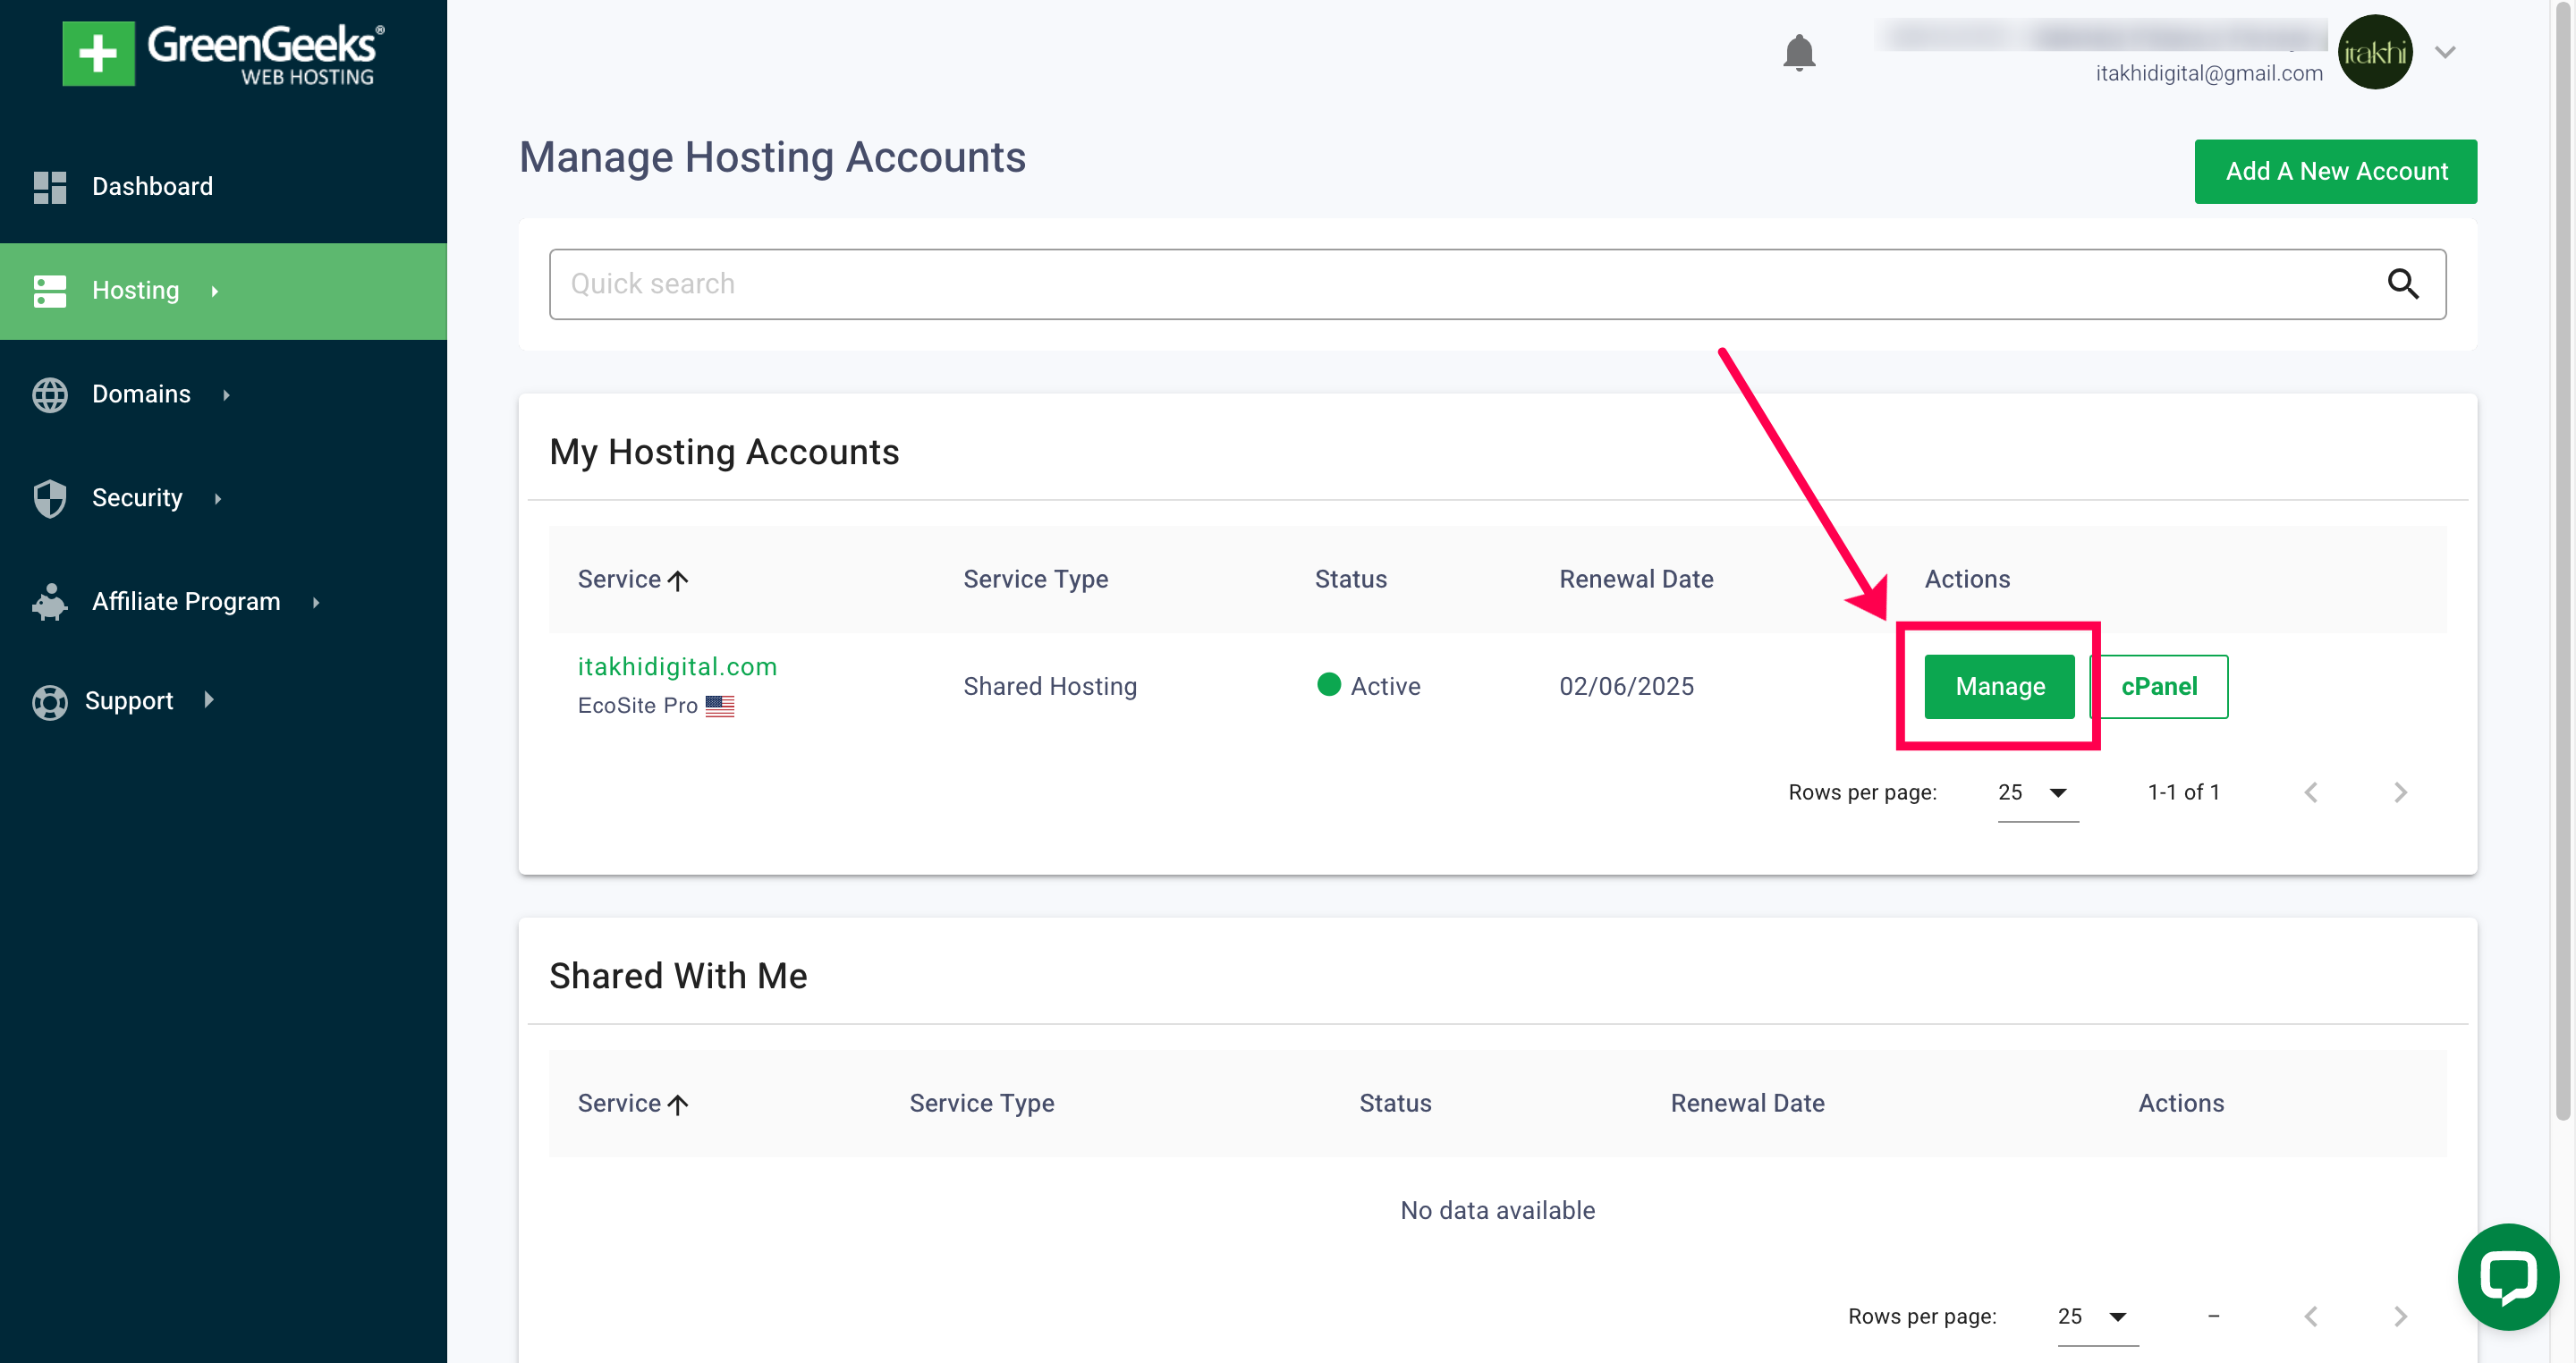
You will enter your hosting settings area where you will find access either to the cpanel (which we won’t view today) and to GreenGeeks own managing panel. Click on “Manage”.
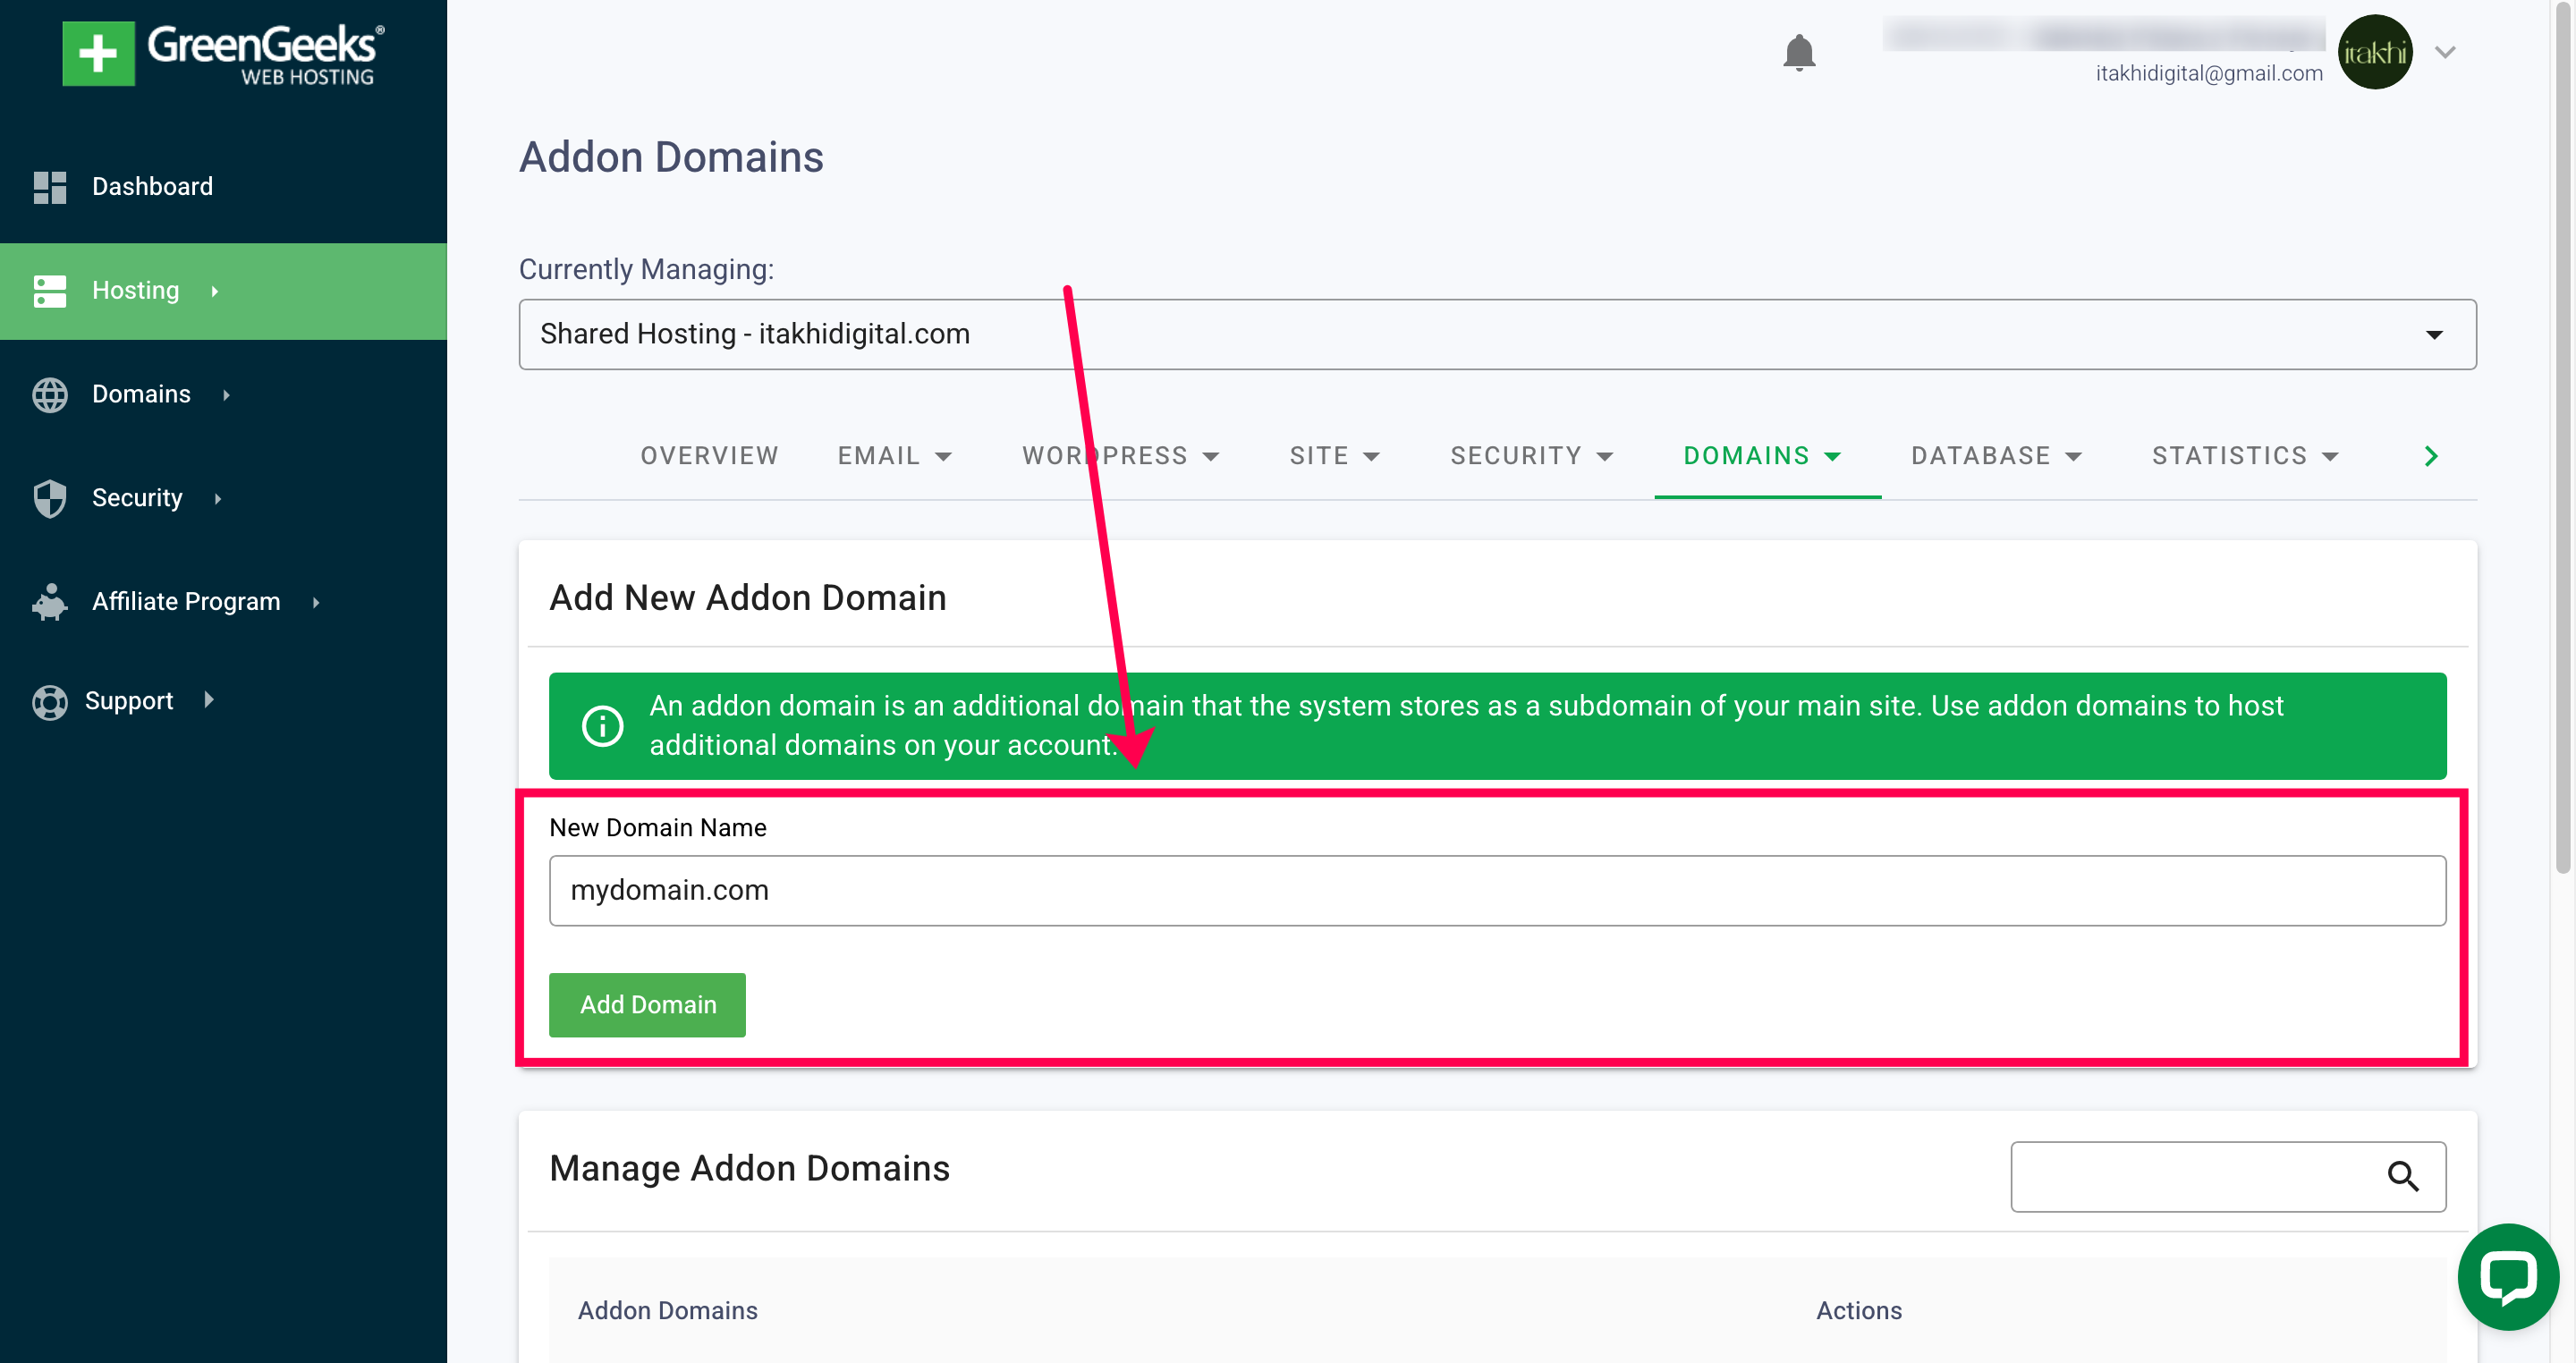
In here you’ll find the tab “Domains” and in the submenu you will have to choose “Addon Domains”.

In the Addon Domains section you can enter the domain name you previously pointed to this server and click on “Add Domain”. If everything goes well you will see your domain on the list below.
And that’s about it!
In conclusion, successfully connecting your domain to hosting is crucial for establishing your online presence. By following these detailed steps, you can seamlessly point your GoDaddy domain to GreenGeeks and manage your website efficiently.
Remember, while the process may seem straightforward, DNS changes can take time to propagate across the internet. Patience is key as you await the full activation of your domain on your hosting platform.
We hope this guide has provided valuable insights and assistance in navigating the domain-to-hosting connection process. If you encounter any difficulties or have questions along the way, don’t hesitate to reach out to the Itakhi for support.
With your domain now connected to hosting, you’re one step closer to launching your website and reaching your online goals. Wishing you smooth sailing on your digital journey!
Good Routes!
Itakhi Team


2 Responses
Loooooove this, so easy to follow! Saved me hours of looking at youtube tutorials and trying to decipher confusing articles.
Thank you! 💚 We are doing our best to create good documentation for these kind of tasks 🤓